
This Whale Was 3D-Printed With Three Filaments and No Paint. AI Agents Made the Geometry Work.
By MobileVibe Team · July 22, 2026 · 5 min read
This Whale Was 3D-Printed With Three Filaments and No Paint. AI Agents Made the Geometry Work.
On my desk is a panel of a whale, printed on a consumer 3D printer using exactly three filaments - blue, black, and white - with no paint and no post-processing. All of its depth and color variation comes from internal geometry that controls how much light passes through each region. I call the technique Deep-Volume Lithopanes, and I could not have gotten it printing reliably without a pile of AI coding agents iterating on the hard geometry with me. Here’s how it came together, and why the build-and-verify loop is what made a fussy computational-geometry problem tractable.
Quick answer
Modern 3D printing has a computational-geometry problem hiding behind it: turning an image into printable, watertight geometry that behaves on real hardware. AI coding agents are unusually good at this kind of iterative, math-heavy work - when they can run and check their output against real files. I built the Deep-Volume Lithopane pipeline by directing Claude Code agents on my machine through MobileVibe, letting them iterate on the geometry until prints came out clean.
What a Deep-Volume Lithopane is
A traditional lithophane encodes a grayscale image as thickness - thin where the image is light, thick where it’s dark - so that when you backlight it, the image appears. It’s a lovely trick, but it’s flat: one channel, grayscale, no real color.
The whale panel does something more. It combines surface texture (the albedo - the material color, with lighting stripped out) with a depth field (how far each part of the subject sits from the viewer) and encodes both into the internal structure of the print. Three filaments, arranged by geometry rather than by paint, produce the color and the sense of depth together. The result reads as a genuinely dimensional, multi-tone image that emerged entirely from how the plastic is arranged.
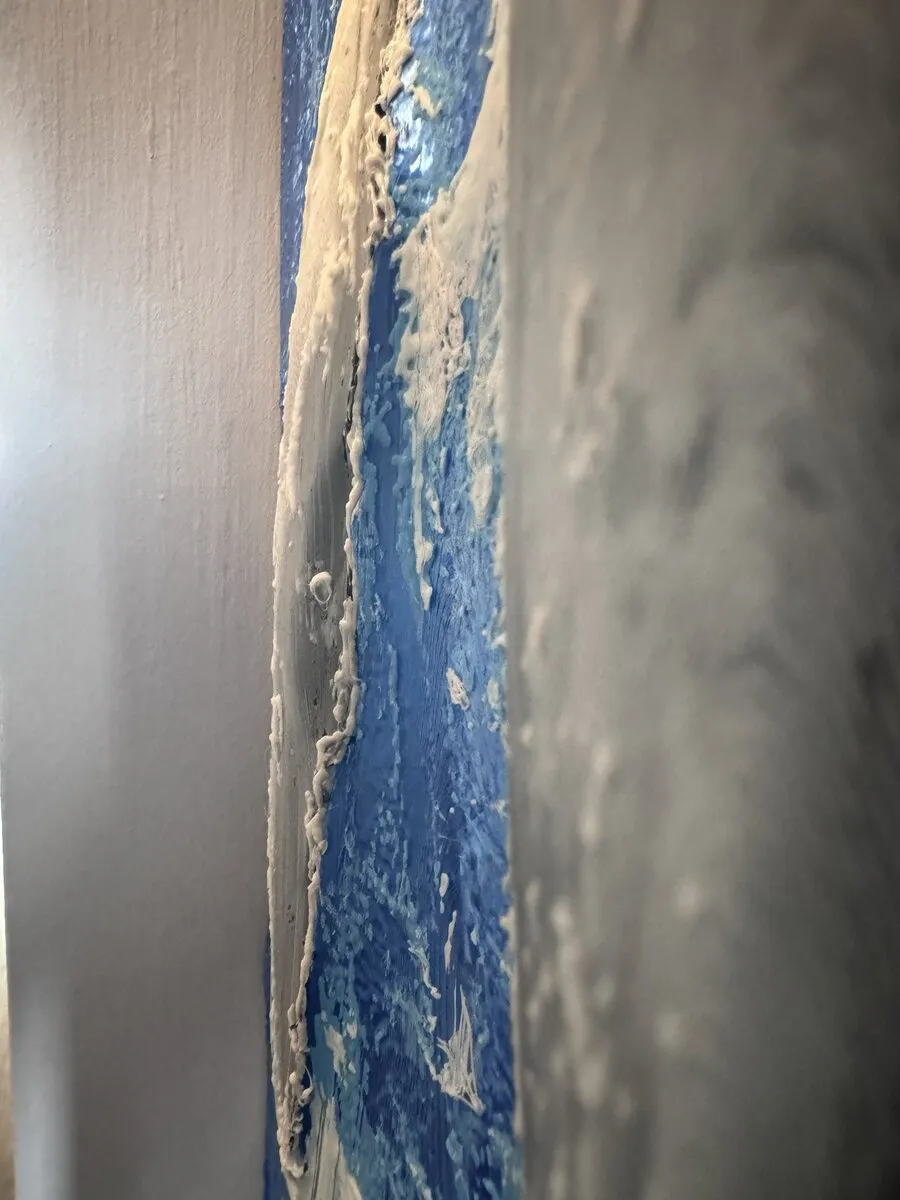 Seen from the side, the depth and color come entirely from internal geometry - no paint, no post-processing.
The pipeline
Getting there took a chain of steps, each with its own failure modes:
- Image preparation. First, strip the lighting out of the source photo. I used AI-based cleanup to remove specular highlights so I was left with pure albedo - the material’s true color, not the glare of whatever light hit it when the photo was taken. Lighting baked into the source would fight the physical lighting of the finished print.
- Depth mapping. I ran the single photo through Depth Anything V2 to generate a dense depth map - a smooth displacement field describing how far each pixel sits from the camera. One ordinary image in, a full depth estimate out.
- Geometric conversion. This is the crux. Both the surface texture and the depth field get treated as topographic maps - like contour lines on a hiking map - and then quantized to the printer’s discrete layers. You combine surface-height contours with displacement-field contours, and the places where they intersect define the regions that actually get printed.
- Print. The quantized geometry goes to a consumer printer with the three filaments.
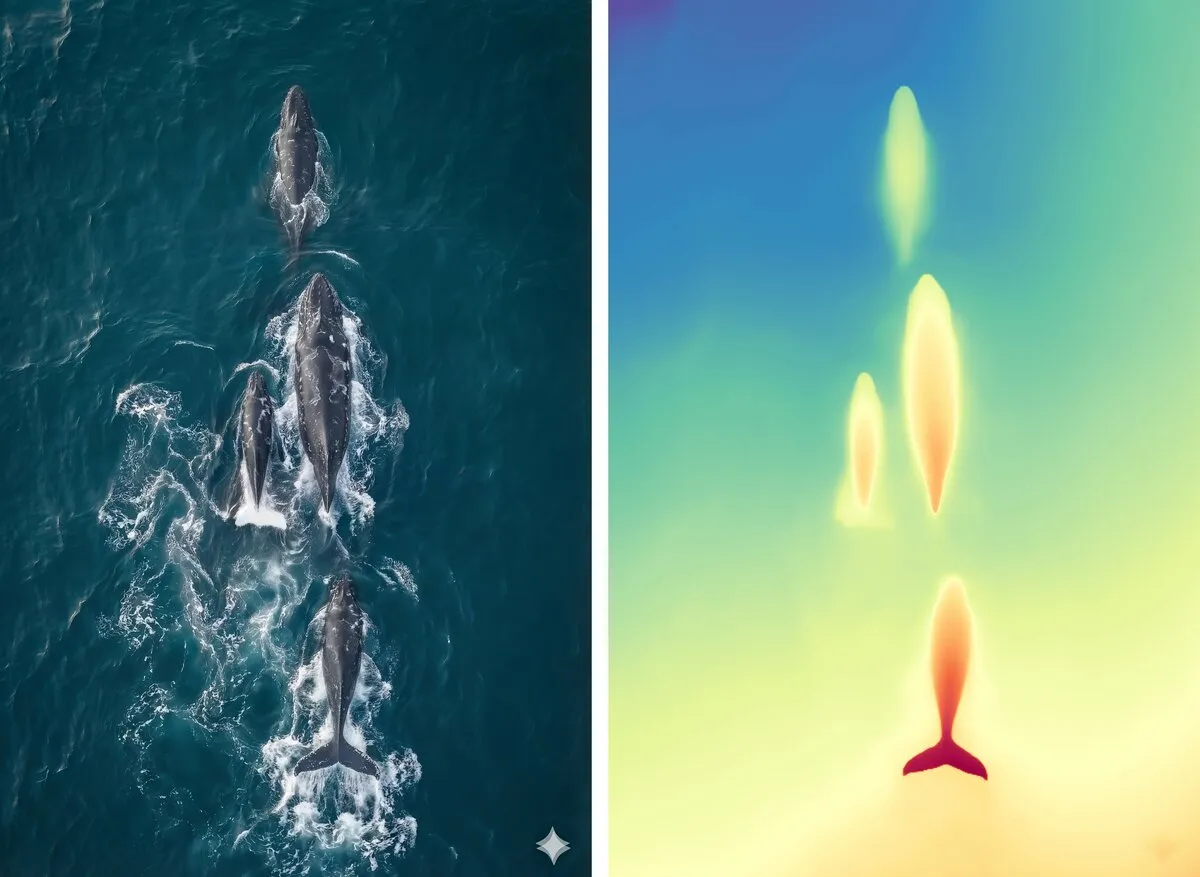 Step 2: a dense depth map estimated from a single ordinary photo - a smooth displacement field.
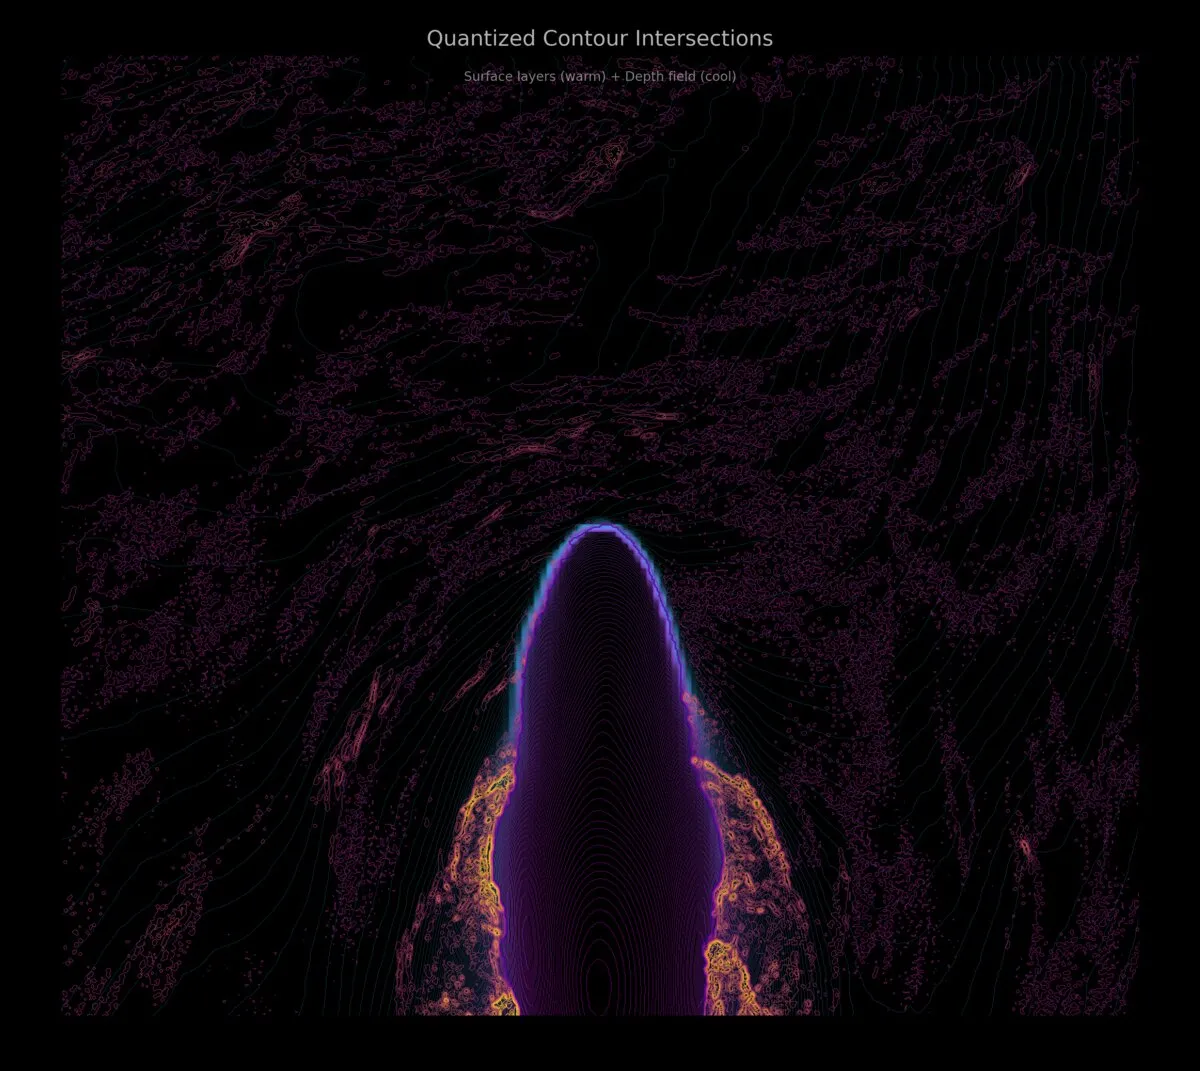 Step 3: surface-height contours combined with displacement contours; where they intersect defines what actually gets printed.
The reason to work in contours and intersections rather than a conventional 3D mesh is subtle but decisive: the layer-based approach sidesteps the geometry problems that wreck prints. Meshes generated from displacement fields love to produce sloped faces, non-manifold edges, and self-intersections - the exact things that make a slicer choke or a print fail halfway up. Working directly in quantized layers keeps the geometry watertight and printable by construction.
Why AI agents were the right tool
This is not a “write me a web form” task. It’s iterative computational geometry, where a subtle mistake in how you quantize or intersect two fields doesn’t throw an error - it just produces a print that’s wrong in a way you only see hours into a failed job. Getting it right meant trying many variations of the conversion math and checking each one against real geometry.
That’s precisely the loop AI agents excel at, and precisely the loop that only works when the agent runs on a real machine. Each iteration, an agent would adjust the contour-and-intersection logic, generate actual geometry, and I could inspect whether it was watertight before ever sending it to the printer. If the agent had been reaching through a thin cloud sandbox with no real filesystem or tooling, it couldn’t have produced and validated printable files - it could only have produced code that looked correct. On genuinely hard technical builds, that difference is everything: agents can’t verify what they can’t run.
So the workflow was a partnership. I brought the concept and judged the results; the agents ran the tedious, error-prone geometry iterations on my hardware and checked their own output. That let us converge on a pipeline that prints reliably on consumer machines instead of one that works in theory and fails in practice.
It generalizes well beyond a whale
The same pipeline isn’t whale-specific - it’s a general way to turn a field of values into printable relief. Point it at terrain elevation data and you get a physical landscape. Point it at satellite imagery, or a scientific dataset, or a medical scan, and you get a tangible object encoding real information. Anything expressible as a surface plus a depth field can flow through the same contour-and-quantization approach.
That’s the part I find most exciting. A weekend project to print a nicer whale turned into a reusable bridge between data and physical objects - the kind of thing that would have been a months-long research effort, compressed into a series of directed iterations because building the thing became cheap enough to actually explore.
The takeaway
If your problem is iterative, math-heavy, and only verifiable by running real code against real files - computational geometry, simulation, data pipelines, hardware toolchains - AI coding agents are a remarkable fit, provided they’re working on a real machine and not an approximation of one. Bring the concept and the judgment; let the agents grind through the iterations and check their work.
If you’ve got a data-to-object idea, or any hard technical build you’ve been putting off, MobileVibe is free to start - pair your desktop and let an agent iterate on the ugly parts while you decide what “right” looks like.
FAQ
What is a Deep-Volume Lithopane?
A 3D print that encodes both surface color (albedo) and a depth field into internal geometry, so that with just three filaments and no paint it shows a multi-tone, dimensional image when lit - depth and color coming from structure rather than pigment.
Why use AI agents for 3D-printing geometry?
Turning images into printable, watertight geometry is iterative, math-heavy work where mistakes surface only in failed prints. Agents are excellent at running that iteration and verifying output - as long as they run on a real machine with a true filesystem and tooling.
Can this technique be used for things other than photos?
Yes. Anything expressible as a surface plus a depth field - terrain data, satellite imagery, scientific datasets - can flow through the same contour-and-quantization pipeline to become a physical object.